
If you are growing cannabis, you know that too much humidity can be a problem when trying to cure your buds. If your curing jar is too humid, it can cause your buds to mold or mildew. There are a few things you can do to lower the humidity in your curing jar.
When Buds Get Jarred Too Fast – Curing Errors #SHORTS
- Start by opening up your curing jar to allow air to circulate and help lower the humidity levels inside
- If you have a hydrometer, check the readings to see what the current humidity level is
- If the readings are too high, consider adding a drying agent such as silica gel or dessicant packets to help absorb some of the excess moisture
- Another way to lower humidity is to simply leave your jar open for longer periods of time each day until the desired levels are reached
- Check on your progress regularly and adjust accordingly until you achieve the perfect conditions for curing your cannabis!
How to Raise Humidity in Curing Jar
If you’re trying to raise the humidity in your curing jar, there are a few things you can do. First, you can try adding a wet paper towel or sponge to the bottom of the jar. This will help to create a humid environment for your plants.
You can also try misting the inside of the jar with water every day or so. Finally, if you have a lid that fits snugly on your jar, you can place it upside down on top of the jar. This will help to trap moisture inside and create a more humid environment.
Curing at 54 Humidity
When it comes to humidity and curing, there are a lot of different schools of thought. Some people believe that higher humidity is better for the curing process, while others believe that lower humidity is best. And then there are those who believe that the ideal humidity level for curing is somewhere in the middle.
So, what’s the truth? Well, as with most things in life, there isn’t necessarily one right answer. The best way to determine what works best for you is to experiment and see what gives you the results you’re looking for.
That being said, there are some general guidelines that can be helpful when it comes to curing at 54% humidity. First of all, it’s important to make sure that your humidor is properly calibrated. If it’s not, your cigars could end up too dry or too moist, which will obviously impact the quality of your smoking experience.
Once you’ve got your humidor dialed in, it’s time to focus on the cigars themselves. When placing your cigars in the humidor, make sure they’re evenly spaced out so that each one has ample room to breathe. This will help ensure that they cure evenly and avoid any potential hot spots.
Finally, don’t forget to check on your cigars regularly during the curing process. At 54% humidity, they should be ready to smoke after about 4-6 weeks (although this can vary depending on factors such as size and type of cigar). Pay attention to how they look and feel during this time so you can gauge when they’re ready to go!
Curing at 58% Humidity
Curing at 58% humidity is a critical step in the production of high quality cigars. If the humidity is too low, the tobacco will not cure properly and the cigar will be dry and harsh. If the humidity is too high, the cigar will be wet and mushy.
Curing at 58% humidity strikes the perfect balance between these two extremes, resulting in a flavorful and enjoyable cigar.
Curing Humidity Level
Are you tired of feeling sticky and uncomfortable all summer long? If so, it’s time to do something about the humidity in your home. High humidity levels can cause a number of problems, including mold growth, musty odors, and condensation on walls and windows.
Luckily, there are a few simple things you can do to cure the problem.
One of the easiest ways to reduce humidity is to use an air conditioner or dehumidifier. These devices work by removing moisture from the air, which can help to make your home more comfortable.
If you don’t have an air conditioner or dehumidifier, you can also try opening up windows and doors to let fresh air in and stale air out. Another option is to use fans to circulate the air in your home.
In addition to using mechanical devices to reduce humidity, you can also take some simple steps to prevent it from building up in the first place.
One of the best ways to do this is to avoid using excess water when cooking or bathing. You should also ventilate areas that tend to be damp, such as laundry rooms and kitchens. Finally, make sure that any leaks in your home are fixed promptly so that moisture doesn’t have a chance to build up.
By taking these steps, you can say goodbye to humid conditions and enjoy a more comfortable home all year round!
High Humidity Curing
High humidity curing is a process that helps to speed up the drying time of concrete. By adding moisture to the air, it allows the hydration process to continue even after the concrete has been placed. This can be beneficial in many situations where time is of the essence.
Burping Jars in High Humidity
As anyone who’s ever made pickles or sauerkraut knows, fermentation creates a lot of gas. In fact, it’s not uncommon for a jar of fermenting vegetables to burp quite loudly on a regular basis. But what happens when the humidity is high?
While most people think that high humidity is bad for fermentation, it can actually be helpful in preventing mold growth on the surface of your ferment. That’s because mold needs oxygen to grow, and the increased moisture in the air will help to keep oxygen away from your fermenting vegetables.
Of course, you still need to be careful with how much moisture you allow into your jars.
If the air is too moist, it can cause your vegetables to become mushy. The best way to combat this is to use a weight (such as a clean stone or piece of wood) to keep the vegetables submerged under the brine. This will help to prevent them from becoming waterlogged and will also discourage mold growth.
So if you’re worried about fermentation in high humidity, don’t be! Just take some extra precautions and you’ll be sure to end up with delicious, probiotic-rich ferments every time.
Curing at 50% Humidity
Did you know that the ideal humidity level for curing cannabis is 50%? That’s right – not too wet and not too dry. Too much moisture can lead to mold and mildew, while too little can cause your buds to dry out and become brittle.
So how do you achieve the perfect 50% humidity level? The easiest way is to use a humidifier or dehumidifier in your grow room. You can also add a hygrometer to your grow room so that you can monitor the humidity levels on a daily basis.
Once you have the perfect humidity level dialed in, your buds will be cured to perfection!
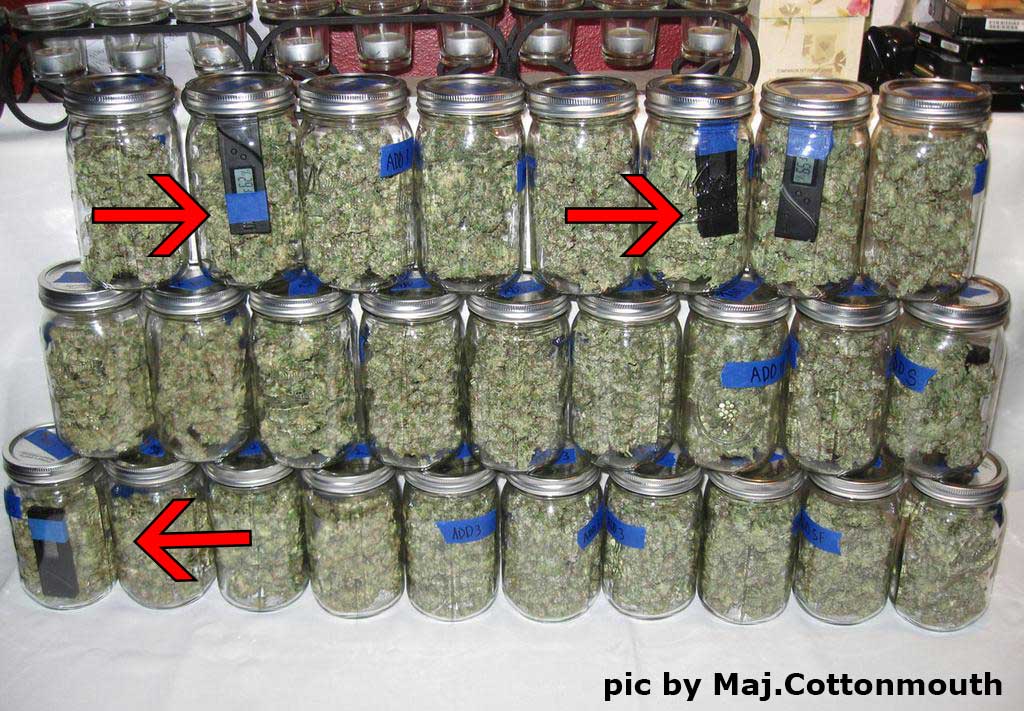
Credit: www.growweedeasy.com
How Do You Lower Humidity When Curing?
When it comes to curing, lowering the humidity is key to ensuring a successful outcome. There are a few different ways to go about this, and the method you choose will depend on your specific situation. If you’re able to control the environment in which your curing takes place, then controlling the humidity should be relatively easy.
However, if you’re curing in an uncontrolled environment, such as outdoors, then you’ll need to take some extra steps to ensure that the humidity is lowered sufficiently.
One way to lower humidity when curing is by using a dehumidifier. This can be placed in the room or area where you’re curing, and will work to remove excess moisture from the air.
This is an effective way to lower humidity levels, but it does require that you have access to power and that your dehumidifier is sized appropriately for the space.
Another way to lower humidity when curing is by using fans.
What Should Humidity Be in Curing Jar?
The ideal humidity for curing cannabis is between 55-60%. This range allows for proper evaporation of excess moisture, while still maintaining enough humidity to prevent the buds from drying out and becoming too brittle. If the humidity falls below 55%, the buds will dry out too quickly and become overly crispy.
If the humidity rises above 60%, the buds will take too long to dry and may develop mold or mildew.
How Often Should I Burp My Jars During Curing?
If you’re curing your own cannabis at home, you may be wondering how often you should burp your jars. The answer is: it depends.
There are a few factors that will affect how often you need to burp your jars, including the size of the jar, the amount of cannabis in the jar, and the humidity level in the curing environment.
In general, small jars (1-2 ounces) will need to be burped more frequently than large jars (4+ ounces). This is because there is less surface area for air to circulate in small jars, so they are more likely to develop pockets of stagnant air.
The amount of cannabis in the jar also affects how often it needs to be burped.
If you have a lot of weed packed into a small jar, it will need to be burped more often than a smaller amount in a larger jar. This is because there is less room for air to circulate around the buds when they are tightly packed.
Finally, the humidity level in your curing environment will also affect how often you need to burp your jars.
If it’s very humid (70%+), you won’t need to worry about burping as much because there is already plenty of moisture in the air. However, if it’s on the drier side (60% or below), you’ll want to make sure toburp your jars more frequentlyto prevent bud drying out and losing weight/potency.
Should I Use Humidity Packs During Curing?
Whether or not you should use humidity packs during the curing process of your cannabis depends on a variety of factors. The climate that you live in, the type of cannabis you are growing, and the stage of plant growth will all play a role in whether or not using humidity packs is necessary.
If you live in an area with high humidity, then using humidity packs may not be necessary as the air already contains a lot of moisture.
However, if you live in an area with low humidity, then using humidity packs can help to keep your plants healthy by providing them with the moisture they need.
The type of cannabis you are growing will also affect whether or not using humidity packs is necessary. Indica strains tend to do better in humid environments while sativa strains prefer drier conditions.
If you are growing an indica strain, then usinghumidity packs may be beneficial.
Finally, the stage of plant growth will also influence whether or not to use humidity packs. Seedlings and clones are much more sensitive to changes in temperature and relative humidity than mature plants.
Therefore, it is often recommended that growers use extra caution when caring for these young plants by providing them with a consistent environment using tools like humidifiers and dehumidifiers, as well as temperature control devices.
Conclusion
If you’ve ever tried your hand at curing meats, you know that one of the most important things to control is the humidity in your curing jar. Too much moisture and your meat will spoil; too little and it will dry out. Luckily, there are a few simple ways to regulate the humidity in your curing jar so that you can get perfect results every time.
One way to lower the humidity in your curing jar is to add a bit of salt to the bottom of the jar before adding your meat. The salt will help to absorb some of the moisture from the meat as it cures, keeping things nice and dry. Another way to keep things dry is to use a small fan to circulate air around inside the jar.
This will help evaporate any excess moisture so that it doesn’t have a chance to settle on the meat and cause spoiling.
Finally, if all else fails, you can always drill a small hole in the lid of your curing jar. This will allow any excess moisture to escape so that it doesn’t have a chance to build up inside and cause problems.
Just be sure to plug the hole when you’re not actively using it so that no contaminants can get in!