
Setting up a terrarium jar is a fun and easy project that can be done in less than an hour. All you need is a clear glass jar, some rocks or pebbles, charcoal (optional), potting soil, and plants.
- Choose a jar that is clear and has a tight fitting lid
- Clean the jar with soapy water and let it dry completely
- Place a layer of gravel or small rocks in the bottom of the jar
- Add a layer of charcoal over the gravel (this will help to keep your terrarium fresh)
- Wet the moss with water and place it over the charcoal
- Add your plants, being careful not to damage their roots, and then add more wet moss on top if needed
Making a Bottle Terrarium + Closed Terrarium Basics
How to Make a Terrarium in a Jar Without Charcoal
What You’ll Need:
– A clear glass jar with a lid (we used a mason jar)
– Potting soil
– Small rocks or pebbles
– Plants of your choice (we used succulents)
– A spoon for scooping
– Optional: decorations like moss, figurines, etc.
Instructions:
1. Start by adding a layer of small rocks or pebbles to the bottom of your jar.
This will help with drainage so your plants don’t get too wet.
2. Next, add a layer of potting soil on top of the rocks. You want to fill the jar about halfway with soil.
3. Now it’s time to add your plants! Gently remove them from their pots and place them in the jar. Once you’re happy with the arrangement, add more soil around the plants if needed.
Be sure to leave some room at the top of the jar so there’s space for air circulation.
4. Finally, decorate your terrarium however you like! We added some moss and mini figurines, but you could also use shells, stones, or anything else that strikes your fancy.
Once you’re done, screw on the lid and enjoy your new creation!
How to Make a Succulent Terrarium in a Jar
When it comes to creating a succulent terrarium, there are many different ways you can go about it. One popular way is to make a terrarium in a jar. This is a great option for those who want to create a small, contained environment for their plants.
Plus, it’s a fun project that you can do with the kids! Here’s how to make your own succulent terrarium in a jar:
1. Start with a clean, dry jar.
You can use any type of jar that you have on hand – mason jars work well, but you could also use an old pickle jar or even a recycled plastic container. Just make sure that whatever type of container you use has drainage holes in the bottom so that excess water can drain out.
2. Add some gravel to the bottom of the jar.
This will help with drainage and prevent your plants from sitting in waterlogged soil.
3. Next, add a layer of potting mix on top of the gravel. You can find potting mix specifically designed for succulents at most garden centers or online retailers.
4 . Now it’s time to start adding your plants! When choosing plants for your terrarium, look for ones that are small in size and have similar watering needs.
Succulents are ideal candidates since they don’t need much water and come in all sorts of shapes and sizes.
How to Make a Terrarium in a Jar With Water
Looking to add a little greenery to your home, but don’t have a lot of space or time? A terrarium jar is the perfect solution! Not only are they incredibly easy to make, but they’re also low-maintenance and can be tailored to fit any style.
Plus, they make for a great conversation starter! Here’s everything you need to know about how to make a terrarium in a jar with water.
The first step is to gather all of your supplies.
You’ll need a clean glass jar (any size will do), some rocks or gravel, charcoal (this helps keep the water clean), potting soil, and plants. When it comes to choosing plants, opt for ones that don’t require a lot of sunlight or water. Succulents and air plants are always a good choice.
Once you have all of your supplies, it’s time to start assembling your terrarium! Begin by adding a layer of rocks or gravel to the bottom of the jar. This will help with drainage.
Next, add a layer of charcoal on top of the rocks. This will help keep the water clean and prevent bacteria from growing.
Now it’s time for the plants!
Carefully remove them from their pots and arrange them however you’d like in the jar. Once you’re happy with the placement, begin filling in gaps with potting soil until the roots are fully covered. To finish things off, add some more rocks or gravel on top for decoration (and extra drainage).
Now all that’s left is to add water! Fill up your jar until the soil is moistened, but be careful not too overdo it–too much water can actually kill your plants. And that’s it–you’ve now made your very own terrariumjar!
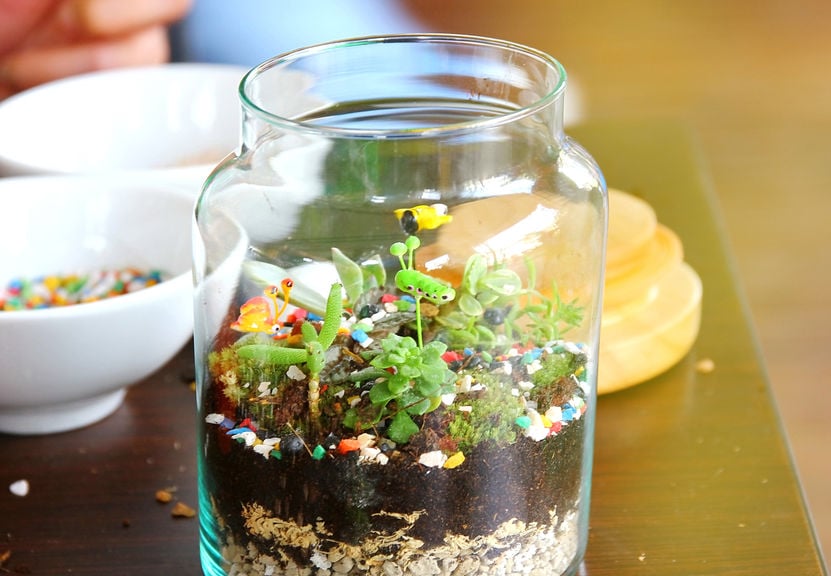
How to Make a Terrarium in a Jar With Insects
Assuming you would like a blog titled “How to Make a Terrarium in a Jar With Insects”:
If you’re looking for a fun and easy project that will spruce up any room, look no further than this guide on how to make a terrarium in a jar with insects! This charming decoration is not only easy to make, but it’s also low-maintenance and can be customized to your own personal taste.
Plus, it’s the perfect way to show off your bug-loving personality!
What You’ll Need:
-1 glass jar (any size will do)
-1 handful of small rocks or pebbles
-1/2 cup of potting soil
-1 plant or small tree (we recommend something like moss, ferns, or ivy)
-1–2 inches of water
-Optional: 1–2 insects of your choice (be sure to research which bugs are safe to keep in captivity first!)
Directions:
1. Start by adding the small rocks or pebbles to the bottom of your glass jar. This will help with drainage when you water your plants later on.
2. Next, add in the potting soil until it reaches about halfway up the jar.
Be sure to pack it down slightly so that it’s nice and compact.
3. Now it’s time to add your plant! Gently remove it from its pot and place it in the center of the jar.
Add more soil around it until it’s completely covered, then give it a good pat down.
4. Once your plant is all set, slowly pour in water until the soil is moist but not soggy—about 1–2 inches should do the trick. Again, be careful not to overwater as this can cause problems for your plants down the road.
Credit: www.nelliebellie.com
How Do You Make a Simple Terrarium Jar?
A terrarium is a great way to add some greenery to your home, and they’re pretty easy to make! Here’s what you’ll need:
– A clean, clear glass jar with a lid.
Make sure the lid has holes in it so that air can circulate.
– Some small rocks or gravel for drainage.
– Activated charcoal (you can find this at most pet stores).
This will help to keep your terrarium fresh and free of mold.
– Potting soil. Make sure you use something that’s light and well-draining.
Regular dirt from your garden won’t work well here.
– Plants! Choose something that’s small and slow-growing, since they’ll be confined to the space of the jar.
Succulents or cacti are always a good option.
1) Start by adding a layer of small rocks or gravel to the bottom of your jar. This will help with drainage so that your plants don’t get waterlogged.
2) Next, add a layer of activated charcoal over top of the rocks/gravel. This will help keep things fresh and free of mold.
3) Now it’s time for the potting soil!
Add enough to fill the jar about halfway up; again, make sure it’s light and well-draining so that your plants don’t get waterlogged.
4) Time to add your plants! Gently remove them from their pots and place them in the soil, being careful not to damage their roots too much as you do so. Once they’re all in there, give them a good watering with some distilled water (tap water can contain chemicals that can be harmful to plants).
What Do You Need to Make a Jar Terrarium?
To make a jar terrarium, you will need the following materials:
-A clear glass jar with a lid (any size will work, but a wider mouth makes it easier to add plants and décor)
-Potting soil
-Rocks or pebbles
-Moss
-Plants (succulents work well for terrariums since they don’t require much water)
-Decorations (optional)
Instructions:
1. Start by adding a layer of rocks or pebbles to the bottom of your jar.
This will help with drainage so your plants don’t get too wet.
2. Next, add a layer of potting soil. You want enough to cover the rocks and give your plants room to grow, but not so much that it’s crammed in there tightly.
3. Now it’s time to add your plants! Choose ones that are small enough to fit in your jar and that won’t mind being in close quarters with other plants. Gently remove them from their pots and arrange them however you like in the soil.
Once you’re happy with the placement, start adding more potting soil around them until they are firmly in place.
4. To finish things off, add a layer of moss and any decorations you want (like mini figurines or shells).
How Do I Make a Mason Jar Terrarium?
If you’re looking for a fun and easy project to add a little greenery to your home, look no further than a Mason jar terrarium! Here’s everything you need to know to get started.
What is a Terrarium?
A terrarium is essentially a miniature garden in a glass container. Unlike traditional gardens, terrariums are self-contained ecosystems that require very little maintenance. That makes them perfect for busy people or anyone who doesn’t have a lot of space for gardening.
There are two types of terrariums: open and closed. Open terrariums are best for plants that don’t mind a little extra humidity, while closed terrariums create their own microclimate and can support more delicate plants. For our Mason jar terrarium, we’ll be using the closed method.
What You’ll Need
• 1 quart-sized Mason jar with lid • Sheet moss • Activated charcoal • Potting soil • Small rocks or gravel • Plants (we used Sedum spurium ‘Dragon’s Blood’ and Sempervivum ‘Hens & Chicks’) • Scissors • Spoon or other small scooping tool
Tools
• Drill with 1/4″ bit (optional)
Instructions
1. Start by adding a layer of small rocks or gravel to the bottom of your Mason jar.
This will help drainage so your plants don’t get too wet.
2. Next, add a layer of activated charcoal on top of the rocks. This helps keep your terrarium clean by absorbing excess moisture and preventing bacteria growth.
How Do You Make a Terrarium Step by Step?
You will need:
-clear glass or plastic container with a lid
-potting soil
-small rocks or gravel
-plants (succulents work well)
-a spray bottle with water
1. Choose your container. It should be clear glass or plastic and have a lid that fits snugly. Consider the size of your plants when selecting a terrarium – you want them to have room to grow, but not so much space that the roots get crowded.
If you’re using a bowl, make sure it’s deep enough for layering.
2. Add a layer of small rocks or gravel to the bottom of your container. This will help with drainage and prevent your plants from sitting in waterlogged soil.
3. Next, add a layer of potting soil on top of the rocks/gravel. Again, consider the size of your plants when deciding how thick this layer should be – they should have enough room to spread their roots without being too cramped.
4. Now it’s time to start adding plants!
Gently remove each plant from its pot and loosen any tightly packed roots before placing it in the soil. If you’re using succulents, you can arrange them close together since they don’t need as much root space as other types of plants. Once all of your plants are in place, give them a good watering using a spray bottle filled with water.
Conclusion
This blog post walks readers through the process of creating a terrarium jar. The author provides step-by-step instructions and includes photos to illustrate each step. Readers will need some supplies including a glass jar, rocks, soil, and plants.
The author also offers suggestions for choosing plants that will thrive in a terrarium environment.