
Deer meat is a delicious, nutritious way to add variety to your diet. And, with a little advance planning, it’s easy to can deer meat in jars. Here are some tips to get you started.
First, start with high-quality deer meat. Choose cuts that are lean and free of any visible fat or gristle. If necessary, trim the meat before canning.
Next, prepare your jars and lids according to the manufacturer’s instructions. Be sure to sterilize the jars and lids to prevent contamination.
Now, it’s time to cook the deer meat.
There are many different ways to do this, but whichever method you choose, be sure to cook the meat until it is very tender. This will ensure that it will be safe to eat after canning.
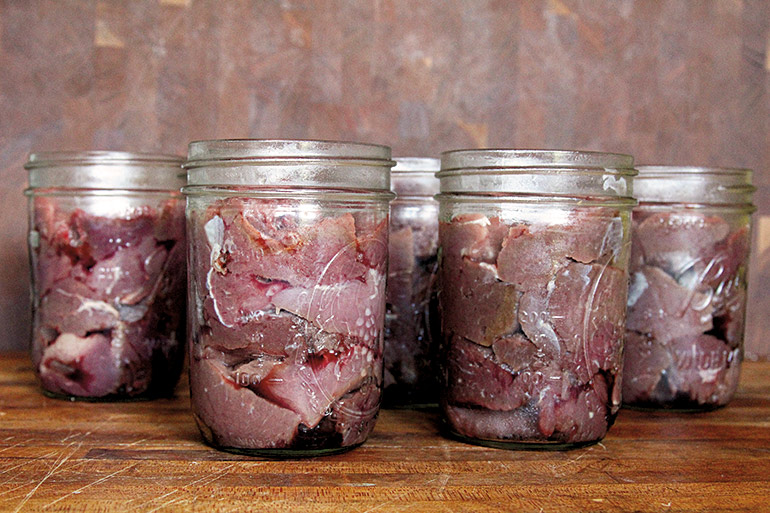
Once the deer meat is cooked, let it cool slightly before spooning it into the prepared jars.
Fill each jar almost to the top, leaving just a half-inch of headspace at the top of the jar. Use a clean knife or spatula to remove any air bubbles that may have formed in the jar.
- First, you will need to process the deer meat by removing all of the fat and gristle
- Cut the meat into small pieces that will fit into your jars
- Next, sterilize your jars and lids by boiling them in water for 10 minutes
- While the jars are boiling, mix together a brine solution of 1 cup of salt per gallon of water
- Once the jars have been boiled, carefully fill each one with deer meat, leaving about an inch of headspace at the top of the jar
- Pour the brine solution over the meat in each jar, making sure that all of the pieces are covered with liquid
- Wipe any spills off of the rims of the jars with a clean cloth
- Put on the lids and screw on the rings until they are finger-tightened
- Do not overtighten them or they may not seal properly
- Place the jars in a large pot or canner and add enough water to cover them by 2 inches
Easy Prep Venison! Canning Deer Meat!
How Long Does Deer Meat Last Canned?
Deer meat canned can last for a very long time if done correctly. The key to having deer meat canned last is in the preparation, canning and storage process.
When preparing to can deer meat, it is important to start with high quality, fresh meat.
The deer should be butchered soon after being killed and the meat should be cut into small pieces that will fit easily into jars. Any fat on the meat should be trimmed off as fat can cause the canned deer meat to go bad more quickly.
The next step is to cook the deer meat until it is tender.
This can be done by boiling, baking or stewing the meat. Once cooked, the deermeat needs to be packed into hot jars, leaving about an inch of headspace at the top of each jar. The jars need to then be sealed tightly and placed in a boiling water bath for the appropriate amount of time depending on their size.
After canning, it is important to check each jar to make sure that the seal is tight before storing them away.
Can You Can Deer Meat Without a Pressure Canner?
No, you cannot can deer meat without a pressure canner. Pressure canning is the only method approved by the USDA for canning meat, and it is necessary to destroy any harmful bacteria that may be present in the meat. If you try to can deer meat without a pressure canner, you run the risk of food poisoning.
Do You Need to Cook Venison before Canning?
If you are planning to can venison, you will need to cook it first. Canning is a great way to preserve food, but it requires special care when dealing with meat. This is because meat needs to be cooked properly in order to avoid bacterial contamination.
There are two main methods for cooking venison before canning: boiling and pressure cooking. Boiling is the simplest method and involves placing the meat in a pot of boiling water for several minutes. This will kill any bacteria that may be present on the surface of the meat.
Pressure cooking is a more efficient method and involves cooking the meat under high pressure. This kills bacteria more effectively and also helps to tenderize the meat. If you are using a pressure cooker, make sure to follow the instructions carefully in order to avoid any accidents.
Once the venison is cooked, it can then be canned using a hot water bath or a pressure canner. Hot water bath canning is simple and only requires a large pot, some jars and lids, and some water. Pressure canning is slightly more complicated but will allow you to preserve your food for longer periods of time.
When canning venison, make sure to use sterile jars and lids that have been washed in hot soapy water. Fill each jar with cooked venison, leaving about an inch of headspace at the top of the jar. Add enough boiling water or broth to cover the meat, making sure there are no air bubbles present.
How Do You Can Raw Venison?
If you’re lucky enough to have access to fresh venison, you might be wondering how to go about canning it. Canning venison is a great way to preserve your meat for future use, and it’s actually not that difficult to do. Here’s a step-by-step guide on how to can raw venison.
Before you get started, make sure you have all the necessary supplies on hand. You’ll need a pressure canner, canning jars and lids, and of course the venison itself. Cut the meat into small pieces – this will help it fit into the jars more easily and also ensure that it cooks evenly during the canning process.
Now it’s time to start prepping your jars. Sterilize them by boiling them in water for 10 minutes, then remove them from the heat and let them cool slightly before adding the meat. Fill each jar with as much meat as possible, leaving about an inch of headspace at the top of the jar.
Next, add a teaspoon of salt per quart (or half teaspoon per pint) of liquid in each jar. This helps improve flavor and ensures proper preservation of your canned venison. Now it’s time to add some liquid – water or broth both work well here.
Again, leave about an inch of headspace at the top of each jar before sealing with a lid and ring finger tight .
Now place your jars in your pressure canner ensuring that they’re level so that they cook evenly. Add enough water to cover the jars by two inches and then put on the lid accordingto manufacturer’s instructions.
. Once everything is set up correctly, vent steam fromthecanner for 10 minutes before putting onthe weight . Cook at 10 pounds offor 75 minutes for pints or 90 minutes for quarts .
When finished cooking , turn offthe heat but don’t removetheweight untilthe pressure has completely come down naturally – this could take 30-60 minutes depending onyour particularcanner model .. Finally ,removejars carefullyusing tongsand placeonacooling rack or towelto finish cooling undisturbedfor 12-24 hours ..
After cooled double checkthatalljars have sealed properlybefore storingin acool darkplacefor longtermuse ..
Credit: www.petersenshunting.com
How to Can Deer Meat Without a Pressure Cooker
If you’re new to canning, the process of preserving foods in jars may seem a bit daunting. But with a little practice, anyone can learn how to do it! Canning deer meat is a great way to enjoy venison all year long – and it’s really not that difficult.
Here’s how to do it:
1. Start with fresh, clean deer meat. Cut it into small pieces and trim away any fat or gristle.
2. Soak the meat in a brine solution for 1-2 hours. This will help to keep it from drying out during the canning process.
3. Preheat your oven to 275 degrees Fahrenheit.
4. Place the pieces of deer meat on racks in your oven and cook until they reach an internal temperature of 160 degrees Fahrenheit. This could take anywhere from 4-6 hours, depending on the size of the pieces of meat.
5. Once the meat is cooked, remove it from the oven and let it cool slightly before handling.
Conclusion
Deer meat is a healthy, delicious alternative to other meats. Canning deer meat is a great way to preserve it for future use. There are a few things to keep in mind when canning deer meat.
First, be sure to remove all of the fat from the meat. Fat can cause the meat to spoil more quickly. Second, cut the meat into small pieces so that it will fit into jars easily.
Third, sterilize the jars and lids before adding the meat. This will help prevent bacteria from growing on the food. Finally, cook the deermeat before canning it.
This will help to seal in the flavor and nutrients.