
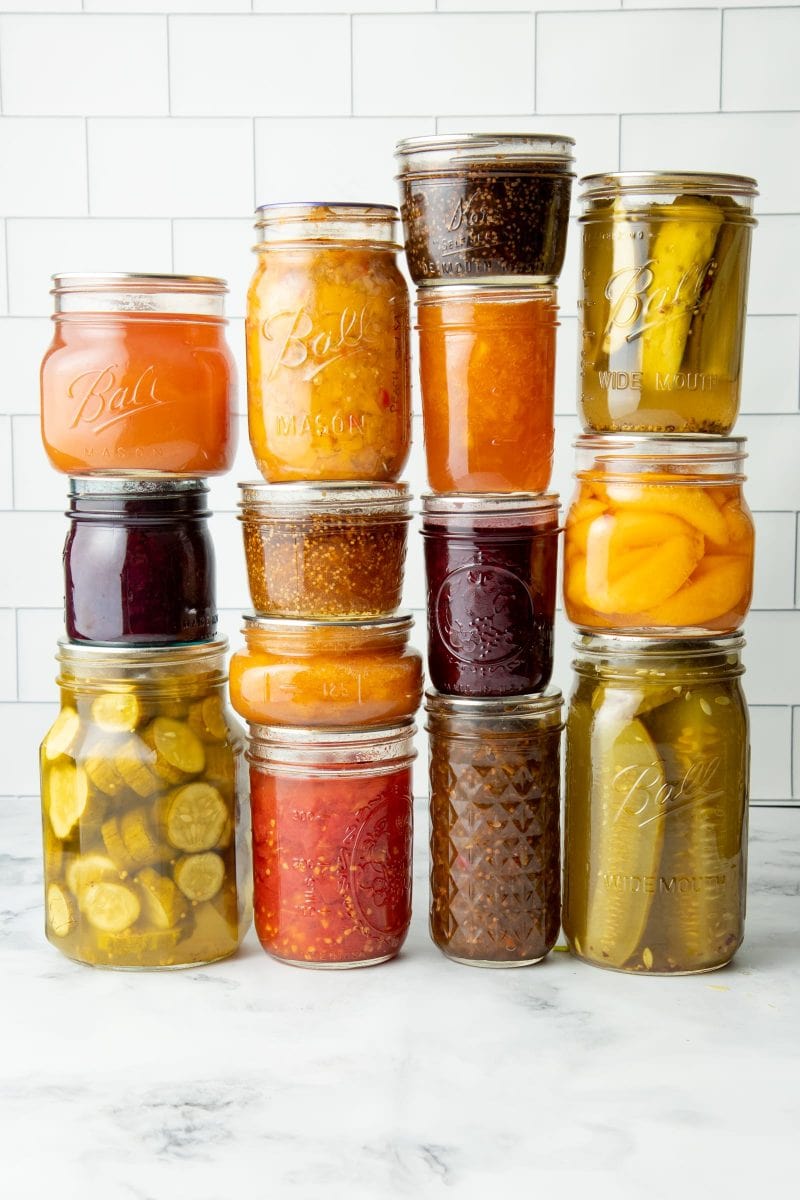
Canned jars are a great way to preserve food. They can be used for canning fruits, vegetables, and even meat. Canning jars come in a variety of sizes, so you can choose the right size for your needs.
When canning jars, it is important to use the proper sealing method to ensure that the food will remain fresh and safe to eat.
- Gather your supplies
- You will need jars, lids, a pot, a canning rack (if you’re using a water bath method), and something to boil the jars in (if you’re using a pressure canner)
- Sanitize your jars and lids by boiling them for 10 minutes
- Fill your pot with water and place the rack inside
- Place the jars on the rack, making sure they are covered with at least an inch of water
- Boil for 10 minutes
- Fill each jar with whatever you’re wanting to preserve, leaving about 1/2 an inch of headspace at the top of each jar
- Use a damp cloth to wipe any food off of the rims of the jars before placing on the lids and screwing on the rings until finger-tight
- Place the filled jars back into the pot, making sure they are covered with at least an inch of water again 8
- Boil for 10 minutes if you’re using a water bath method or follow instructions specific to your pressure canner if that’s what you’re using
- 9 Let cool completely before removing from pot
canning is easy – how to
Do You Have to Boil Jars to Can?
No, you don’t have to boil jars to can. In fact, boiling is one of the least effective methods for sterilizing jars and can actually cause them to break. If you’re using a boiling water bath method for canning, the only time you need to boil your jars is when you’re adding them to the canner filled with boiling water.
How Do You Can Jars Without a Canner?
If you don’t have a canner, you can still process your jars of food using a boiling water bath method. This is a simple way to preserve fruits, jams, jellies, pickles, and tomatoes. You will need a large pot with a lid that can fit all of your jars upright and leave room for boiling water around them.
You will also need something to elevate the jars off the bottom of the pot so they are not in direct contact with the heat source. A rack made for canning works well, or you can use a layer of clean towels.
Fill the pot with enough water to cover the jars by 1-2 inches and bring it to a boil.
Carefully lower the filled jars into the boiling water using a jar lifter or tongs. Make sure the jars are upright and not touching each other so that hot water can circulate around them evenly. Put the lid on the pot and return it to a boil.
Once it reaches a rolling boil, processed for 10 minutes (if you are at high altitude, check with your local cooperative extension office for recommended processing times).
After 10 minutes, turn off the heat and carefully remove the lid from the pot.
How Long Do You Boil Jars for Canning?
There is a lot of debate on how long to boil jars for canning. The general consensus is that you should boil the jars for at least 10 minutes. This will ensure that the jars are properly sterilized and will help to prevent any spoilage or contamination of the food.
How Do You Start Canning for Beginners?
If you’re interested in canning food at home, it’s important to understand the basics of how to do it safely. Canning is a method of preserving food in which the food is sealed in airtight containers. This prevents microorganisms from entering and spoiling the food.
There are two types of canning: water bath canning and pressure canning. Water bath canning is suitable for high-acid foods like fruits and pickles. Pressure canning is necessary for low-acid foods, such as vegetables, meat, and poultry.
To get started with canning, you’ll need some basic supplies:
Canner: A large pot with a lid that fits snugly. You’ll use this to heat up your jars of food before sealing them.
Canning jars: Glass jars with screw-on lids that come in various sizes. Be sure to choose jars that are specifically made for canning; regular glass jars may not be strong enough to withstand the heat and pressure involved in canning.
Jar lifter: A tool used to lift hot jars out of the canner.
It looks like tongs with rubberized ends so that it won’t slip when lifting a hot jar.
Funnel: Used to pour hot liquids into jars without making a mess.
Lid wand: A plastic or metal rod with a magnet on one end; used to lift lids out of boiling water without touching them directly (the magnet will grab onto the metal disk on top of the lid).
Now that you have your supplies, you’re ready to startcanning! Here’s a basic overview of the process:
1) Wash your jars, lids, and rings in warm soapy water; rinse well and set aside until needed.
2) Prepare your food accordingto your recipe.
3) Fill your cannerwith 2-3 inches of water and place it on the stove over medium heat; bring the water to a simmer but don’t let it boil yet.
4) Use the funnelto fill each jar with prepared food, leaving about ½ inch headspace at the top of each jar (this is important so that there’s room for expansion during processing). 5) Remove any air bubblesby running a nonmetallic spatula or wooden chopstick around the inside edge of each jar; add more food or remove some if necessary to adjust headspace..
Credit: wholefully.com
How to Can Without a Canner
If you’re looking to can your food without a canner, there are a few methods you can use. The most important thing to remember is that you need to sterilize your jars before using them. You can do this by boiling them for 10 minutes, or running them through the dishwasher on a hot cycle.
Once your jars are sterilized, you’re ready to start canning! Here are a few methods you can use:
1. Boiling water method: This is the most common way to canned without a canner.
Simply fill your jars with whatever food you want to preserve, leaving about an inch of headspace at the top. Then, place the lids on the jars and screw on the rings until they’re tight. Next, place the jars in a large pot of boiling water and let them cook for the recommended amount of time (this will vary depending on what you’re preserving).
Finally, remove the jars from the pot and let them cool completely before storing them away.
2. Oven method: If you don’t have a large pot big enough to fit all of your jars, you can use your oven instead! Preheat it to 225 degrees Fahrenheit and then place your filled jars onto a baking sheet lined with foil or parchment paper (this will help prevent sticking).
Once all of the jars are in the oven, bake them for 30 minutes and then turn off the heat but leave the door closed for another 5-10 minutes. This will help finish sealing any lids that may not have sealed properly during cooking. Again, let the jars cool completely before storing away.
3. Microwave method: Yes, believe it or not, you can actually microwave jarred foods too! Fill your jar as usual and screw on the lid until tight. Then place it in microwavesafe bowl filled with about 2 cups of water (this helps prevent scorching).
Microwave on high for 2-3 minutes and then carefully remove from microwave (it’ll be hot!).
Conclusion
This blog post gives a detailed tutorial on how to can jars. It explains the different types of jars, how to sterilize them, and how to fill them properly. It also covers how to seal the jars and how to store them.