
Making your own Mason jar night light is a great way to add some extra light to your home without spending a lot of money. You can use any size or type of Mason jar, but I prefer to use the small jelly jars. You will also need a small candle, some clear glue, and a piece of cardboard.
- Gather your materials
- You will need a mason jar, a LED tea light, hot glue and scissors
- Cut a small hole in the center of the mason jar lid
- Hot glue the LED tea light to the underside of the lid
- Screw the lid back on to the jar
- Flip the switch on the bottom of the LED tea light to turn it on, and enjoy your new night light!
Easy Mason jar night light / Diy Mason jar craft / Glass jar decorating ideas / jar painting
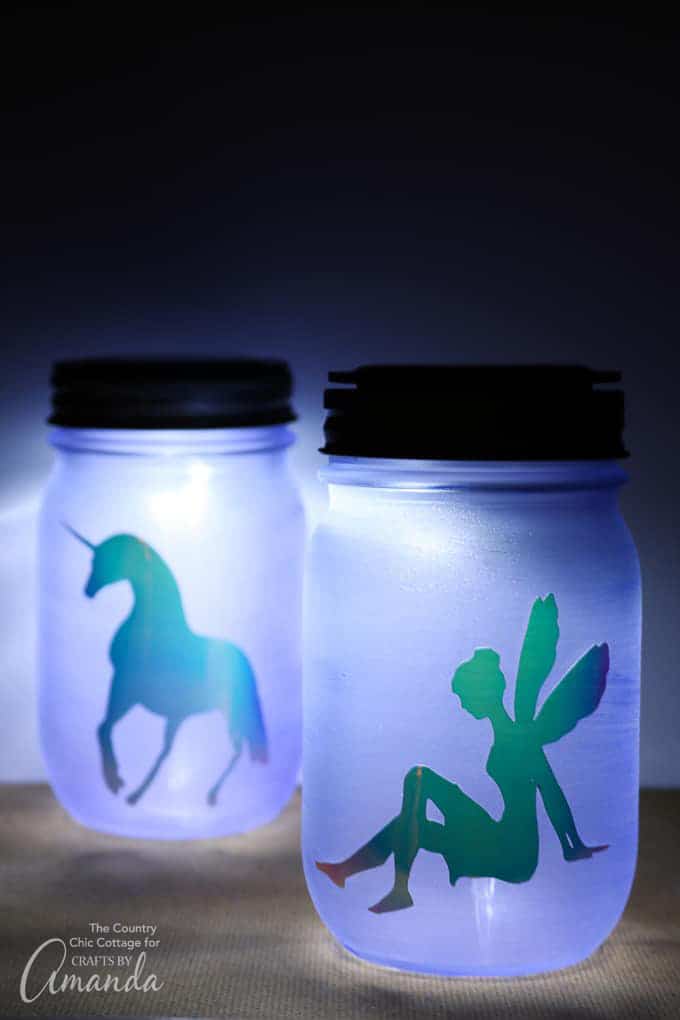
How to Make a Fairy Jar Night Light
Making your own fairy jar night light is a fun and easy project that you can do with your kids! All you need is a clean, empty jar, some glue, glitter, and a battery-operated tea light. Here’s how to make it:
1. Start by spreading some glue around the inside of the jar. You can use a brush or your fingers to do this.
2. Sprinkle glitter over the glue.
We like to use iridescent glitter for a magical effect!
3. Place the tea light in the center of the jar. That’s it!
Your fairy jar night light is now ready to enjoy!
What to Fill Mason Jars With for Decoration
One of the best things about Mason jars is their versatility. Not only are they great for canning and preserving food, but they also make stylish and affordable decoration pieces for your home. If you’re looking for some creative ideas for how to decorate with Mason jars, here are a few of our favorites.
One simple way to dress up a Mason jar is to fill it with colorful stones or marbles. This makes for a beautiful and unique paperweight or desk accessory. You could also use smaller pebbles to create a pretty vase filler.
Another idea is to fill your jars with sand and seashells from your last beach vacation – this makes for a lovely reminder of summertime all year long!
If you’re looking for something a little more festive, try filling your Mason jars with Christmas lights. This makes for a beautiful and inexpensive holiday decoration that will fill any room with warmth and cheer.
For an even more dramatic effect, try filling multiple jars with lights and arranging them in centerpiece-worthy displays on your dining room table or mantelpiece.
Looking for another way to add some character to your décor? Fill mason jars with dried flowers, leaves, or other natural elements like berries, acorns, or branches.
These make stunning fall or winter decorations that will bring the beauty of nature into your home.
How to Tint Mason Jars on the Outside
Looking for a fun way to add some color to your home décor? Tinting mason jars is a simple and easy way to do just that! All you need is some glass paint and a little bit of time and you’ll have beautiful tinted mason jars to use as vases, storage containers, or anything else you can think of.
Here’s what you’ll need:
-Mason jars (any size will work)
-Glass paint in the colors of your choice
-Paintbrush
-Newspaper or something else to protect your surface
-Optional: clear sealer (to make the color more permanent)
First, lay out your newspaper or other protective surface. Then, start by painting the bottom inch or so of your jar with glass paint. You can be as messy or precise as you want – it’s up to you!
Once you’ve covered the bottom portion of the jar, begin painting vertical stripes up the side. Again, feel free to make them as wide or thin as you like. Once you’ve reached the top of the jar, start on another jar and repeat until all of your jars are painted.
Let them dry completely before moving on to the next step.
Now comes the fun part – adding water! Fill each jar with water, being careful not to splash any paint off of the sides.
The water will cause the paint to bleed and blend together, creating a beautiful ombre effect. If desired, finish off by sealing with a clear sealer for added durability. Enjoy your new tinted mason jars!
Mason Jar Cup Ideas
If you’re anything like us, you probably have a few mason jars hanging around your house. And if you’re looking for a fun and unique way to use them, we’ve got the perfect solution – mason jar cups!
These Mason Jar Cup Ideas are perfect for any occasion, whether you’re hosting a party or just want to enjoy a cute cup of coffee.
We’ve rounded up some of our favorite ways to dress up mason jars, so all you need is a little imagination (and maybe some washi tape).
For a festive touch, try wrapping the rim of your mason jar cup with colorful washi tape. This is an easy way to add a pop of color and personality to your cup.
If you want to keep it simple, just wrap the base of the jar with tape or ribbon.
Another idea is to decorate the outside of the jar with stickers or other embellishments. You can find all sorts of fun things at your local craft store, or get creative and use items from around your house.
Get creative and have fun with it!
If you’re looking for something more permanent, consider painting the outside of your jar. This is a great option if you want to match the colors of your event or party decorations.
Just make sure to use paint that’s made specifically for glass surfaces.
Once you’ve decided how to decorate your mason jar cup, it’s time to fill it up! These cups are perfect for holding cold beverages like iced tea or lemonade.
Or if it’s wintertime, fill them with hot cocoa and marshmallows for a cozy treat. No matter what you choose to put in yours, we know they’ll look adorable doing it!
Credit: craftsbyamanda.com
Can You Use a Mason Jar As a Light Fixture?
Yes, you can use a mason jar as a light fixture. You will need to purchase a mason jar light kit, which includes a lid with a hole for the cord and a metal ring to secure the jar to the electrical box. You will also need to purchase an LED light bulb that fits inside the jar.
Once you have all of the necessary supplies, follow these steps:
1. Turn off the power to the circuit that you will be working on at your home’s breaker box.
2. Remove the old light fixture from the electrical box.
Be sure to disconnect any wires before removing the fixture.
3. Install the new mason jar light fixture by screwing it into place in the electrical box. Connect all of the wires according to their color coding (black to black, white to white, green or bare copper to green or bare copper).
4. Tighten all screws and secure any wire nuts before turning on power at the breaker box.
How Do You Make Fairy Mason Jar Lights?
Fairy mason jar lights are a popular decoration for both indoor and outdoor events. To make your own, you will need: mason jars, fairy lights, hot glue and scissors.
Begin by removing the lid from the mason jar.
Cut a small hole in the center of the lid using scissors. Next, insert the end of the fairy light into the hole. Apply hot glue around the edge of the hole to secure the light in place.
Finally, screw the lid back onto the jar. Repeat this process for each mason jar you wish to use. When finished, simply switch on the fairy lights and enjoy your new décor!
How Do You Make Glow in the Dark Lanterns With Mason Jars?
If you’re looking for a fun and easy craft project, try making your own glow in the dark lanterns with mason jars! All you need is some paint, glitter, and a black light. Here’s how to do it:
1. Start by painting the outside of your mason jar with glow in the dark paint. You can use any color you like, but we suggest using bright colors so they’ll really stand out in the dark.
2. Once the paint is dry, add some glitter to the outside of the jar.
This will make your lanterns sparkle and shine when they’re turned on.
3. Now it’s time to add the black light bulb. We suggest using an LED bulb so it doesn’t get too hot inside the jar.
Just screw it into place and turn it on.
4. That’s it! Your glow in the dark lanterns are now ready to enjoy.
How Do You Make Mason Jar Ceiling Lights?
Making mason jar ceiling lights is a fun and easy project that anyone can do! All you need are some mason jars, string lights, and a few other supplies.
Start by removing the labels from your mason jars.
If the labels are stubborn, you can soak them in warm water for a few minutes to loosen them up. Once the labels are off, give the jars a good wash with soapy water and let them dry completely.
Next, use a drill or punch to make holes in the lids of the jars.
The holes should be big enough to fit your string lights through. If you’re using battery-operated lights, be sure to make the holes big enough for the batteries too!
Once all of your jars have been prepped, it’s time to start assembling your light fixture.
Begin by screwing the lids onto the jars tightly. Then, thread your string lights through the holes in the lids and arrange them however you like. If you’re using battery-operated lights, be sure to turn them on before screwing on the final lid!
Finally, use some strong adhesive to attach your Mason jar light fixture to the ceiling. Voila!
Conclusion
This blog post outlines how to make a night light using a mason jar. You will need a mason jar, some wire, and a small LED light. First, cut a hole in the lid of the mason jar big enough to fit the LED light.
Next, thread the wire through the hole and around the rim of the lid, securing it in place with tape. Finally, insert the LED light into the hole and screw on the lid. Your night light is now complete!