
If you’re looking for a fun and easy project to do with the kids, painting mason jars is the perfect activity! All you need is some paint, brushes, and a little bit of creativity. Here’s a step-by-step guide on how to paint a mason jar:
First, choose the paint colors you want to use. You can either go with a single color or multiple colors. Once you’ve decided on the colors, pour them into separate bowls or cups.
Next, take your brush and dip it into the paint. Then start painting the outside of the jar. If you’re using multiple colors, make sure to paint each section with a different color.
Once you’re finished painting, set the jar aside to dry. Depending on the type of paint you used, it may take several hours or even overnight for the jar to dry completely.
- Choose the color or colors you want to use for your mason jar
- You can find special glass paint at most craft stores
- Clean the mason jar well with soap and water, then dry it completely
- Pour a small amount of paint onto a plate or other surface, and dip the brush into the paint
- Apply the paint to the mason jar in long, even strokes
- You may need to apply several coats of paint to get good coverage
- Let the paint dry completely before using the mason jar
How to paint mason jars
How to Paint a Mason Jar With Acrylic Paint
If you’re looking for a fun and easy project to add some personalization to your home, painting a mason jar is a great option! All you need is some acrylic paint and a little bit of time, and you can have a beautiful and unique piece that’s entirely your own. Here’s how to do it:
1. Start by cleaning the mason jar with soapy water. This will help the paint adhere better.
2. Next, decide on the colors you want to use.
You can either go with one solid color or mix things up with multiple colors. Once you’ve decided, start painting! Use long strokes for best results.
3. If you’re using multiple colors, let each layer dry completely before adding the next one on top. This will help prevent the colors from running together.
4. Once all of the paint is dry, seal it with a clear coat of spray sealant or Mod Podge .
How to Paint Mason Jars for Flowers
If you’re looking for a fun and easy project to dress up your home, try painting mason jars for flowers! This is a great way to add a personal touch to any room, and it’s also a great way to show off your personality. Here’s how to get started:
1. Choose the right paint. Acrylic paint is best for this project since it adheres well to glass and dries quickly. You’ll need about 2-3 ounces of paint per jar, depending on the size of the jar.
2. Prepare your workspace. Cover your work surface with newspaper or a drop cloth to protect it from paint spills. Place the jars upside down on the surface so that you can easily reach all sides when painting.
3. Start painting! Use long, even strokes to apply the paint evenly over the entire surface of each jar. If you want, you can use multiple colors or create designs with stencils .
Let the paint dry completely before moving on to the next step .
4 . Add embellishments .
Once the paint is dry , you can add finishing touches like ribbon , twine , or beads around the rim of each jar . Be creative and have fun with this part !
5 .
Fill ‘ er up ! Now comes the best part : filling your newly painted mason jars with fresh flowers ! Arrange them however you like and enjoy your handiwork .
How to Make Painted Mason Jars Waterproof
Making your own waterproof mason jars is a great way to add some personalization to your home décor. You can use them as vases, storage containers, or even as planters. The best part is that they’re super easy to make!
Here’s what you’ll need:
-Mason jars
-Acrylic paint
-Clear sealant (optional)
-Ribbon or twine (optional)
Start by painting the outside of your mason jar with the acrylic paint.
You can be as creative as you want with this step – use one color or mix and match different colors and designs. Let the paint dry completely before moving on to the next step.
Once the paint is dry, you have the option of sealing it with a clear sealant.
This will help protect the paint from chipping or fading over time. If you decide not to seal it, just be aware that the painted design may not last as long.
Finish off your jar by adding a ribbon or twine around the rim.
This is purely for aesthetics, but it really makes the jar look complete! And that’s it – your very own waterproof mason jar!
How to Paint.Mason Jars for Baby Shower
Have you ever seen those beautiful Mason jars that people use for everything from drinking glasses to storage containers? They’re so cute and trendy, and they can be used for just about anything.
If you’re looking for a unique baby shower gift, why not paint a set of Mason jars for the mom-to-be?
You can use them as vases or storage containers, and she’ll always think of you every time she uses them.
Here’s what you’ll need:
–Mason jars (you can find these at any craft store)
–Acrylic paint in various colors
–Paintbrushes
–A piece of cardboard or an old newspaper to protect your work surface
first, decide what colors you want to use. You can stick with a theme (like all pink or blue jars) or go with a more colorful design. Once you have your colors picked out, start painting!
A little goes a long way with acrylic paint, so don’t overdo it. If you make a mistake, no worries – just let the paint dry and start over again.
once your jars are painted and dry (it shouldn’t take more than an hour or two), add some embellishments if you’d like.
You could glue on some ribbon around the rim of the jar, or add a label with the baby’s name and birth date. These painted Mason jars make such sweet gifts – your friends will love them!
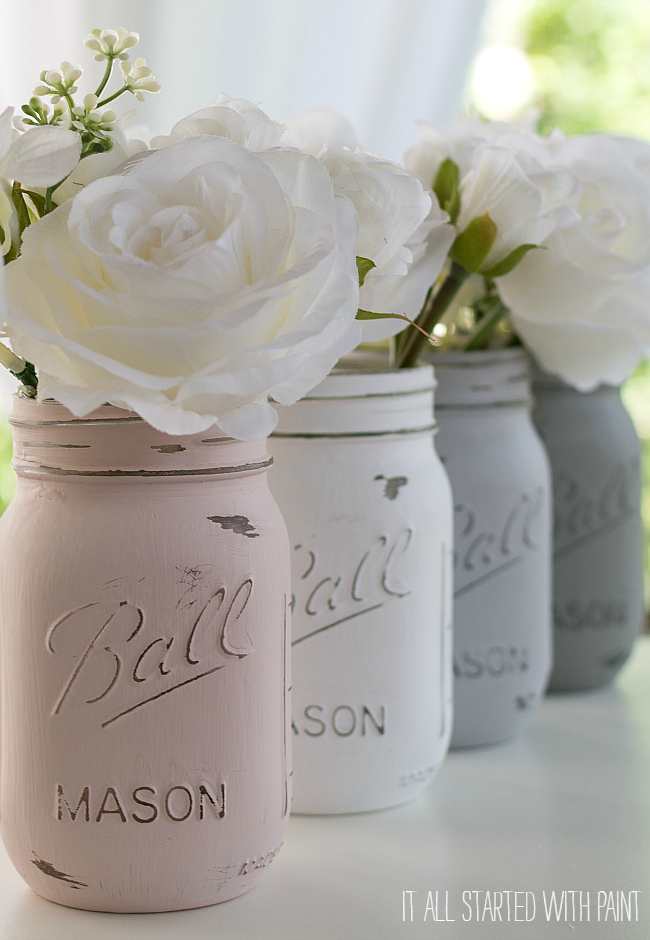
Credit: www.itallstartedwithpaint.com
What Kind of Paint Do You Use to Paint a Mason Jar?
If you want to paint a Mason jar, you need to use a special kind of paint. This type of paint is called “enamel.” Enamel paint is different from regular paint because it is designed to resist heat and scratches.
It also has a glossy finish that will make your Mason jar look nicer.
To apply enamel paint to a Mason jar, first clean the surface of the jar with soap and water. Then, dry the jar completely.
Next, put some enamel paint on a brush or sponge and apply it to the jar. Make sure that you cover the entire surface of the jar evenly. Finally, let the paint dry for 24 hours before using the jar again.
How Do You Get Paint to Stick to Mason Jars?
If you’re looking to add a little DIY flair to your home décor, painting mason jars is a fun and easy way to do it. But if you’ve ever tried painting on glass, you know that getting the paint to stick can be a bit tricky. With a few simple tips, though, you can get great results that will last.
First, it’s important to start with clean jars. If they’re new, just give them a quick rinse. If they’re used, wash them with soapy water and let them dry completely.
Once they’re clean, roughen up the surface of the jar with sandpaper. This will help the paint adhere better.
Next, choose the right type of paint.
Regular acrylic craft paint works well for most projects, but if you want something more durable, opt for enamel paint designed specifically for glass surfaces. These paints usually require curing (baking in an oven), so be sure to follow the instructions on the label.
Once you have your supplies gathered, decide what design you want to paint on your jars.
You can freehand a design or use stencils for a more uniform look. If using stencils, tape them in place before starting to paint. When painting inside the lines (or outside of them!), use long strokes and go slowly so that the paint doesn’t glob up or run under the stencils.
Allow your painted jars to dry completely before using them – this could take several hours or even overnight depending on the type of paint you used. And that’s it!
What Kind of Paint Do You Use to Paint Glass Jars?
There are a few different types of paint that can be used on glass jars. One type is acrylic paint, which is a water-based paint that dries quickly and is available in a wide range of colors. Another type of paint that can be used on glass is enamel paint, which is an oil-based paint that has a glossy finish and comes in fewer colors than acrylic paint.
Whichever type of paint you choose, make sure to use a thin layer so that the design on the jar is visible.
What is Needed to Paint Mason Jars?
If you’re looking to add a personal touch to your home décor, painting mason jars is a great way to do it! Here’s what you’ll need:
-Mason jars of any size
-Acrylic paint in the colors of your choice
-Paintbrushes (small ones work best)
-Paper towels or a rag
-A bowl of water for cleaning the brushes
To start, make sure your jars are clean and dry. Then, pour some paint into a bowl or onto a plate.
Using a brush, apply the paint to the jar in long strokes, being careful not to leave any bare spots. If you make a mistake, no worries – just dip a paper towel or rag into some water and wipe away the paint before starting over. Once you’re happy with how your jar looks, set it aside to dry.
That’s it! Now you have a one-of-a-kind painted mason jar that can be used as a vase, candle holder, or anything else you can imagine.
Conclusion
To paint a mason jar, first clean the jar and remove any labels. Next, apply a base coat of paint and let it dry. Once the base coat is dry, apply a second coat of paint in your desired color.
Let the second coat of paint dry completely before adding any embellishments. To finish, seal the painted mason jar with a clear sealer to protect your design.