
For many of us, the process of decorating jars with ribbon bows is a familiar one. Whether we are canning our own fruits and vegetables or simply giving a gift in a jar, this simple decoration adds a touch of homemade charm. But for those who have never attempted to tie a ribbon bow on a jar, the process can seem daunting.
With a few simple steps, however, anyone can create beautiful ribbon bows to adorn their jars.
To start, you will need a length of ribbon long enough to wrap around the circumference of the jar lid plus about 6 inches. Cut the ends of the ribbon at an angle so that they will lay flat when glued down.
Center the middle of the ribbon on top of the jar lid and glue in place. Wrap each side of the ribbon around the edge of the lid, gluing as you go. Once you reach the end of each side, tuck under any loose ends and glue down.
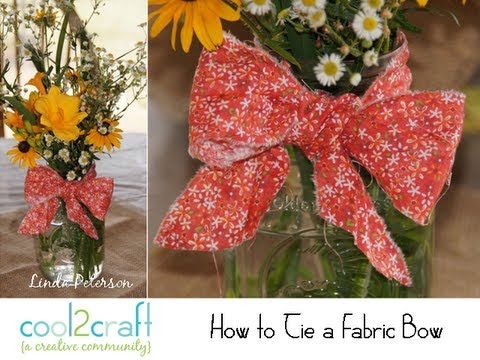
How to Tie a Fabric Bow on Mason Jar by Linda Peterson
- Cut a piece of ribbon to the desired length, plus an extra 6 inches
- Fold the ribbon in half so the two ends meet in the middle, and make a loop with the folded end, securing it with a dot of glue or a small piece of clear tape
- This will be one side of your bow
- Make another loop on the other side of the first loop, securing it in the same way
- You should now have two loops facing opposite directions
- Take the end of one loop and bring it over to the other side, making sure that the raw edge is tucked underneath so it’s not visible
- Secure this end with another dot of glue or piece of tape
- Do the same thing with the other loop, bringing it over to form a cross in the center of your bow loops
- Once both ends are securely fastened in place, fluff out your loops and adjust them as necessary until you’re happy with how they look
How to Tie a Bow on a Present With Thick Ribbon
One of the most classic ways to finish off a wrapped present is with a bow. But if you’re using thick ribbon, it can be tricky to get the bow to stay in place. Here’s a step-by-step guide to tying a bow on a present with thick ribbon:
1. Start by making a loop with the ribbon, leaving about 8 inches of tail. Cross the loop over itself and pinch in the middle to form a second loop.
2. Make another loop with the ribbon, crossing it over the first two loops.
Pinch in the middle again to secure all three loops together.
3. Now take both tails of the ribbon and make them into loops (one loop for each tail). Cross one loop over the other and pull through the hole created in the center.
Pull tight to secure in place.
4. Finally, fluff out all your loops and tails to create a full and festive bow!
How to Tie a Bow With Cloth
Tying a bow with cloth is not as difficult as it may seem. With a little practice, you’ll be able to tie bows that are perfect for any occasion. Here’s how to do it:
1. Cut a piece of cloth into a strip that is about 18 inches long and 2 inches wide.
2. Fold the strip in half lengthwise so that the two long edges meet in the middle.
3. Tie a knot in the middle of the strip, making sure to leave enough slack so that you can form loops on either side of the knot.
4. Take one end of the strip and make a loop, holding it between your thumb and first two fingers. Do the same with the other end of the strip.
5. Cross the two loops over each other in the middle, and tuck one loop under the other.
Pull tight to secure in place. You’ve now formed the basic shape of your bow!
6. To finish, take both ends of the strip and make small loops (or “bunny ears”).
How to Tie a Burlap Bow on a Mason Jar
Burlap bows are a popular way to decorate mason jars. They can be used for a variety of purposes, including as vases, centerpieces, or even as gifts. Here is a step-by-step guide on how to tie a burlap bow on a mason jar:
1. Start by wrapping the burlap around the neck of the jar. Make sure that the ends of the burlap are even.
2. Tie the burlap in a knot at the base of the jar’s neck.
3. Take one end of the burlap and make a loop. Then, take the other end of the burlap and pass it through the loop (this will create a second loop). Pull both loops tight so that they’re close to each other but not touching.
4. Fold the two loops in half so that they form ears on either side of the bow’s center knot. Fluff out each ear for added dimensionality.
How to Tie a Flat Knot With Ribbon
If you’re looking for a simple, elegant way to finish off a gift, look no further than the flat knot with ribbon. This knot is easy to tie and adds a touch of class to any package. Here’s how to do it:
1. Start with a length of ribbon that is twice as long as you need. Fold the ribbon in half so that you have a loop at one end and two tails at the other.
2. Thread the tails through the loop, then pull tight.
You should now have a basic knot.
3. To finish, take the left tail and make a small loop (or “bight”). Next, take the right tail and thread it over the top of the bight before tucking it underneath itself.
Pull tight and admire your handiwork!
How to Tie a Bow With Wired Ribbon around a Box
If you’re looking for a way to add a little extra flair to your wrapped gifts, try adding a bow made out of wired ribbon! It’s a simple process that can be done in just a few steps.
First, start with a piece of wired ribbon that is long enough to go around the box and tie into a bow.
If you’re not sure how much to use, err on the side of too much rather than too little. You can always trim off any excess later.
Next, wrap the wired ribbon around the box, making sure that the wire is on the inside so it doesn’t show.
Cross the two ends in the back and bring them around to the front.
Now it’s time to start tying your bow! Make sure that both pieces of ribbon are even and begin by tying a basic knot in the center.
Then, take one side and make a loop (or “bow”) shape and hold it in place with your thumb. Do the same thing with the other side. Finally, bring both loops together and pinch in the middle before pulling tight and securing with another knot.
Trim off any excess ribbon and you’re all done!
Credit: www.youtube.com
How Do You Tie a Ribbon into a Jar?
If you’re looking to add a decorative touch to a jar, tying a ribbon around it is a simple and effective way to do so. There are a few different ways that you can tie a ribbon around a jar, and the best method will depend on the type of ribbon and jar that you’re working with. In general, however, you’ll want to start by threading the ribbon through the lid of the jar, then tying it in a knot or bow at the top.
You can also try wrapping the ribbon around the outside of the jar and securing it with glue or double-sided tape.
No matter which method you choose, tying a ribbon around a jar is an easy way to dress it up and make it look more polished. So next time you’re looking for a quick and easy way to spruce up a gift or decoration, reach for some ribbons and get creative!
How Do You Tie a Ribbon Bow around a Vase?
If you want to add a touch of elegance to a vase, try tying a ribbon bow around it. You can use any type of ribbon, but we recommend using something that’s at least 2 inches wide. Here’s how to do it:
1. Start with a strip of ribbon that’s about 18 inches long. Fold the strip in half so that the ends meet in the middle.
2. Place your thumb and first two fingers in the center of the loop, then bring the ends up and over your fingers (like you’re making a ponytail).
3. Cross the ends behind the loop, then bring them back up and through the hole in front (like you’re threading a needle).
4. Pull tight and adjust the loops until they’re even. Then fluff out the bow to give it some shape.
5. To finish, wrap the excess ribbon around the stem of the vase and secure with tape or glue.
How Do You Tie a Simple Ribbon Bow?
Assuming you would like a step by step guide on how to tie a basic ribbon bow:
Step One: Cut your ribbon. You will need about 12 inches of ribbon for a good sized bow.
Step Two: Make a loop with the ribbon, holding it between your thumb and first two fingers. The end of the ribbon should be pointing up.
Step Three: Take the top end of the ribbon and make another loop around the center loop.
Cross it over in the middle and pull tight. You now have what looks like two loops side by side.
Step Four: Make another loop on top of the two loops, going under and then back over again.
This time, when you cross it in the middle, tuck it underneath itself before pulling tight. This creates the third loop.
Step Five: Continue making loops on top of the previous ones until you run out of ribbon or are happy with the size of your bow!
How Do You Tie a Ribbon around a Container?
If you’re looking to add a touch of elegance to a wrapped gift, try tying a ribbon around the container. It’s a simple way to make your present look more polished and put-together. Plus, it’s easy to do!
Just follow these steps:
1. Start with a long piece of ribbon. You’ll need enough to go around the circumference of the container and then some, so err on the side of too much rather than too little.
2. Place the center of the ribbon at the top front of the container. If there’s already a tag attached, position the ribbon underneath it.
3. Wrap the ribbon around to the back of the container and tie it in a knot or bow.
The type of knot or bow you use is up to you – get creative!
4. Trim any excess ribbon from the ends, if necessary. And that’s it!
Your gift is now ready to be given (and sure to impress).
Conclusion
In this post, the author shows how to tie a ribbon bow on a jar. First, cut a piece of ribbon about 12 inches long. Fold the ribbon in half and make a loop with the folded end.
Then, take the two loose ends of the ribbon and make another loop. Cross the two loops in the center and pull tight. Finally, fluff out the loops to create your bow.